I love Italian bread but more specifically, any type of Artisan bread so a couple of days ago, I tried my hand at Ciabatta rolls. I didn’t start them until 8:30 am and wanted them by 6 pm that evening so I was pushing it a little and had to cut my time short on letting it do what it does, but they still turned out amazing.
Homemade Ciabatta
Makes 2 loaves or 16 rolls
Recipe modified from The Ktichn
It’s essential to make the “biga” first. The yeast needs to go through a biga, or pre-ferment stage, and needs to sit for about eight hours at least. Mine only sat for seven hours and worked out okay, but skipping this essential step is what gives the bread it’s amazing flavor, the chewy inside, and the crispy outside. It also helps to weigh out the ingredients.
Biga
4 ounce (1/2 cup) water
1/2 teaspoon active-dry yeast
5 ounce (1 cup) all-purpose flour
Dissolve the yeast in the water. Add the flour and stir to form a thick, gloppy paste. Give it a good fifty or so brisk stirs to build up the gluten. Cover and let sit at room temperature eight hours or overnight. After it has rested, the top will have many inverted bubbles on the top.
Now, to make the actual dough, follow the next set of instructions:
17 ounces (2 cups + 2 tablespoons) water
1 teaspoon active-dry yeast
Biga
20 ounces (4 cups) all-purpose flour
2 teaspoons kosher salt
Dissolve the yeast in the water in the bowl of a standing mixer. Scrape the biga into the water and break it up with your spatula or squeeze it between your hands. You don’t need to completely dissolve the biga; just loosen it up and break it into stringy blobs.
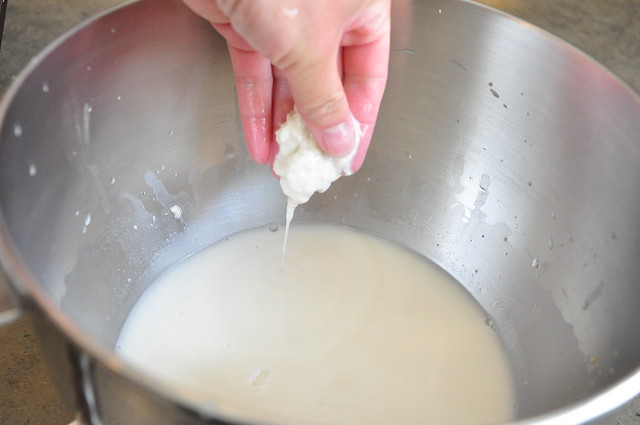
Add all of the flour and the salt. Stir to form a thick, very wet dough. Let this rest for 10-20 minutes to give the flour time to absorb the water.
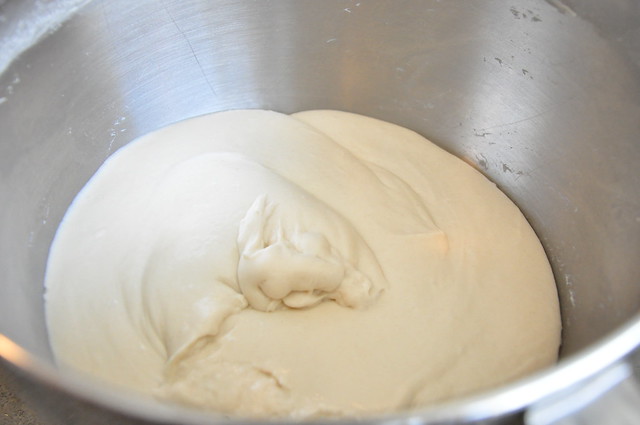
Fit your standing mixer with a dough hook and knead at medium speed for 15-18 minutes (Level 5 or 6 on a KitchnAid). Keep a close eye on your mixer as it has a tendency to “walk” on the counter at this speed (I had to leave to go take care of kids while it was mixing and mine nearly fell off the counter).
The dough will start off sticking to the bottom and sides of the bowl. Around the 7-minute mark, it will start to pull away from the sides of the bowl, collect around the dough hook, and regularly slap the sides of the bowl. If it doesn’t, nudge your mixer speed up a notch. Also, if the dough starts climbing the dough hook, stop the mixer and scrape it down again. By the end of kneading, the dough will look smooth and creamy with a glossy shine. It will puddle back into the bowl once you turn off the mixer, and this is fine.
Cover the bowl and let the dough rise at 70° – 75° for 2-3 hours, until tripled in bulk.
Dust your work surface heavily with flour. Set two sheets of parchment near your work surface. Scrape the dough out of the bowl onto the flour, taking care not to deflate it too much. Dust the top of the dough with more flour. Using a pastry scraper or pizza wheel, cut the dough in two pieces for loaves or into 16 pieces for rolls.
Brush your hands with flour. Working gently but swiftly, scoop the the loaves (or the rolls) one at a time from the work surface to the parchment. Press your fingertips about halfway into the dough to dimple the surface and slightly flatten the loaves (or rolls). Let the loaves (or rolls) rise, uncovered, for 30-40 minutes. When ready to bake, they should look pillowy with many big bubbles just beneath the surface.
Preheat the oven to 475°F while the loaves are rising. If you have a baking stone, put it in the oven now.
When ready to bake, slide the loaves, still on the parchment, onto a pizza peel or baking sheet. Transfer them to the oven to cook, either on the baking stone or directly on the baking sheet if you don’t have a stone. Bake for 20-30 minutes, until puffed and golden brown. Slip the parchment out from under the loaves and cool completely before eating.